Ionic 2 Firebase CRUD Example - Part 1
Ionic 2 Firebase is the great combination for mobile apps development. Ionic 2 as mobile apps and Firebase as data storage, it's all connected using AngularFire. If not confidence how to started create Ionic2 App you can jump back to previous tutorials or you just can skip and moving forward with this tutorial.
1. Setup Firebase
Go to https://console.firebase.google.com and log in using your google account.
Click CREATE NEW PROJECT button, name it as you like (mine: MyIonic2Project) and choose your country. Finally, click CREATE PROJECT button.
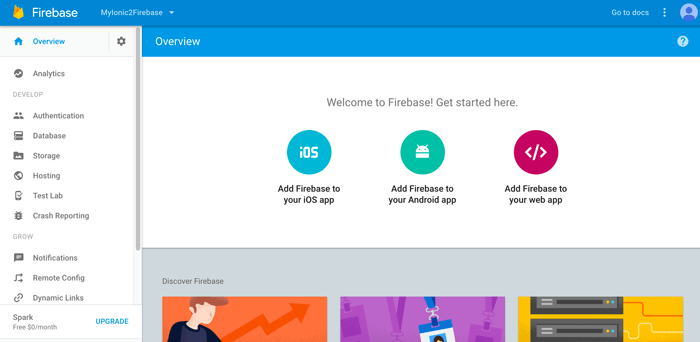
Click Settings (Gear Button) on top left side of Overview then choose Project Settings. You will find api key in here. Go to database menu and click RULES tab then edit to make your database writable and readable for everyone.
{
  "rules": {
    ".read": "auth == null",
    ".write": "auth == null"
  }
}
2. Create Ionic 2 Project
Now, create a new Ionic project using this command:
ionic start MyIonic2Firebase --v2
This might be a long time, just wait for it because it’s running npm install too. After finished you will get a default tabs app because we are not specified the template when we start a project, just leave it as tabs.
3. Configure Firebase and AngularFire2
Go to your Ionic project folder.
cd MyIonic2Firebase
Then install required dependencies:
npm install @types/jasmine@^2.5.36 firebase angularfire2 --save
Open src/app/app.module.ts using your favorite IDE or text editor. Initialize or register firebase config in here. First, import firebase and angularfire2 dependencies after.
import { FIREBASE_PROVIDERS, defaultFirebase, AngularFire, AuthMethods, AuthProviders, firebaseAuthConfig } from 'angularfire2';
In provider declare FIREBASE_PROVIDERS.
providers: [{provide: ErrorHandler, useClass: IonicErrorHandler},

    FIREBASE_PROVIDERS,

    defaultFirebase({

      apiKey: "",

      authDomain: "",

      databaseURL: "",

      storageBucket: "",

    })

  ]
Fill that configuration by a jump into your browser and firebase console. Look for api key that previously shown in Settings. AuthDomain in Authentication at side menu but first create sign-in method, for this example set anonymous to make everyone able to access it. DatabaseUrl in database menu. StorageBucket in Storage menu.
4. Build CRUD
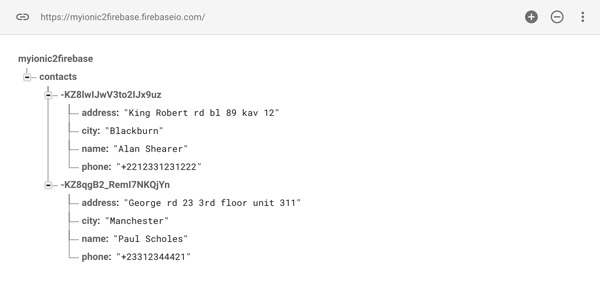
For CRUD functions we are using default contact tabs which will be a contact list. Contact list gets data from firebase named contact and have structure name, address, city, and phone. We will modify current contact page to meet new contact list structure and we add a page for add new contact form.
First, we add the new page for add contact using this ionic 2 command:
ionic g page addContact
Let me explain a little about page generation command. “g” stands for generating, the page is which will be generated and addContact is the name of the page that will be generated. Name of generated page using camel-case which will be add-contact in lowercase for both folder and file name.
Register this new add-contact page to app/app.module.ts, so it looks like this:
import { NgModule, ErrorHandler } from '@angular/core';

import { IonicApp, IonicModule, IonicErrorHandler } from 'ionic-angular';

import { MyApp } from './app.component';

import { FIREBASE_PROVIDERS, defaultFirebase } from 'angularfire2';

import { AboutPage } from '../pages/about/about';

import { ContactPage } from '../pages/contact/contact';

import { HomePage } from '../pages/home/home';

import { TabsPage } from '../pages/tabs/tabs';

import { AddContactPage } from '../pages/add-contact/add-contact';


@NgModule({

  declarations: [

    MyApp,

    AboutPage,

    ContactPage,

    HomePage,

    TabsPage,

    AddContactPage

  ],

  imports: [

    IonicModule.forRoot(MyApp)

  ],

  bootstrap: [IonicApp],

  entryComponents: [

    MyApp,

    AboutPage,

    ContactPage,

    HomePage,

    TabsPage,

    AddContactPage

  ],

  providers: [{provide: ErrorHandler, useClass: IonicErrorHandler},

    FIREBASE_PROVIDERS,

    defaultFirebase({

      apiKey: "AIzaSyCrZpORU_czh2oUrAkRrN7TyuZChUNx0B4",

      authDomain: "myionic2firebase.firebaseapp.com",

      databaseURL: "https://myionic2firebase.firebaseio.com",

      storageBucket: "myionic2firebase.appspot.com",

    })

  ]

})

export class AppModule {}
Edit pages/contact/contact.ts and add a reference to add-contact page around another import lines.
import { AddContactPage } from '../add-contact/add-contact';
Create FirebaseListObservable contactList and populate with data fro Firebase. Also, add function for navigate to addContactPage.
export class ContactPage {

  contactList: FirebaseListObservable<any>;

  constructor(public navCtrl: NavController, public af: AngularFire) {

    this.contactList = af.database.list('/contacts');

  }


  addContact(){

    this.navCtrl.push(AddContactPage);

  }

}
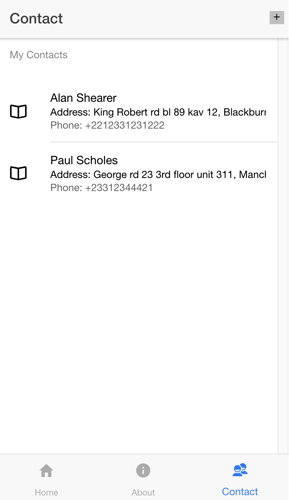
Edit pages/contact/contact.html to add contact list and add-contact button.
<ion-header>

  <ion-navbar>
    <ion-title>
      Contact
    </ion-title>
    <ion-buttons end>
      <button (click)="addContact()">
        <ion-icon name="add"></ion-icon>
      </button>
    </ion-buttons>
  </ion-navbar>
</ion-header>

<ion-content>
  <ion-list>
    <ion-list-header>My Contacts</ion-list-header>
    <ion-item *ngFor="let contact of contactList | async">
      <ion-icon name="book" danger item-left></ion-icon>
      <h2>{{contact.name}}</h2>
      <h3>Address: {{contact.address}}, {{contact.city}}</h3>
      <p>Phone: {{contact.phone}}</p>
    </ion-item>
  </ion-list>
</ion-content>
Then, edit pages/add-contact/add-contact.ts. Import required angularFire, declare contactList and add function for adding new contact.
import { Component } from '@angular/core';
import { NavController } from 'ionic-angular';
import { AngularFire, FirebaseListObservable } from 'angularfire2';


@Component({
  selector: 'page-add-contact',
  templateUrl: 'add-contact.html'
})

export class AddContactPage {
  contactList: FirebaseListObservable<any>;
  constructor(public navCtrl: NavController, public af: AngularFire) {
    this.contactList = af.database.list('/contacts');
  }

  addContact(name, address, phone, city) {
    this.contactList.push({
      name: name,
      address: address,
      phone: phone,
      city: city
    }).then( newContact => {
      this.navCtrl.pop();
    }, error => {
      console.log(error);
    });
  }
}
Edit pages/add-contact/add-contact.html to add a form for creating new contact.
<ion-header>
  <ion-navbar>
    <ion-title>addContact</ion-title>
  </ion-navbar>
</ion-header>

<ion-content padding class="add-contact">
  <ion-item>
    <ion-label stacked>Name</ion-label>
    <ion-input [(ngModel)]="name" type="text" placeholder="Fill yor first and last name"></ion-input>
  </ion-item>
  <ion-item>
    <ion-label stacked>Address</ion-label>
    <ion-input [(ngModel)]="address" type="text" placeholder="Fill your full address"></ion-input>
  </ion-item>
  <ion-item>
    <ion-label stacked>Phone</ion-label>
    <ion-input [(ngModel)]="phone" type="text" placeholder="Fill your phone number"></ion-input>
  </ion-item>

  <ion-item>
    <ion-label stacked>City</ion-label>
    <ion-input [(ngModel)]="city" type="text" placeholder="Fill your city"></ion-input>
  </ion-item>
  <button block (click)="addContact(name, address, phone, city)"> Add Contact </button>
</ion-content>
It’s time for testing what we have done so far. Run your app in the browser.
ionic serve
Navigate to tab contact. For the first time, you will see a blank page with only “My Contacts” header. Then click “+” button to add the new contact.
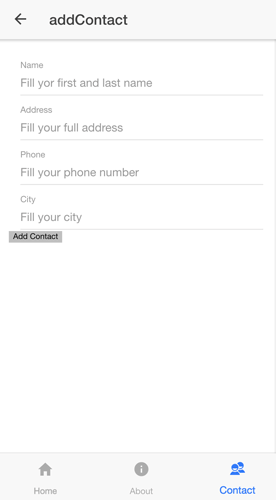
Fill out this form and click add contact button. This should be saved in firebase database and redirect to contact page.
If you curious what happen in firebase database, just go to firebase console dashboard and go to database menu. Your database must be like this:
That it’s for now, next we’ll continue to part II for delete and update function.
Thanks.
0 comments