Step by step tutorial building Ionic 2 REST API Authentication
In this tutorial, we will build app authentication using Ionic 2 and REST API. We already create a tutorial for email and password authentication using Ionic 2 and Firebase, right now we will implementing authentication using our own REST API server. For accomplished it, you can follow the tutorial in another category.
Tutorials above is implementing username and password authentication using REST API with JSON response. Also, you can use your own REST API server of another server that you have an access to it. We use REST API endpoints below for this tutorial.
| Endpoint | Request | Response |
|---|---|---|
| /login | { username: '',password: '' } | auth_token |
| /logout | add a token to headers | |
| /register | { username: '', password: '' } |
Now, let's create the mobile app REST authentication as client side.
1. Create New Ionic 2 App
As usually, we always starting the tutorial from scratch. It means started with the new and fresh app. Open terminal or cmd then go to your projects folder. Type this command for creating new Ionic 2 app or project.
ionic start Ionic2RestAuth --v2
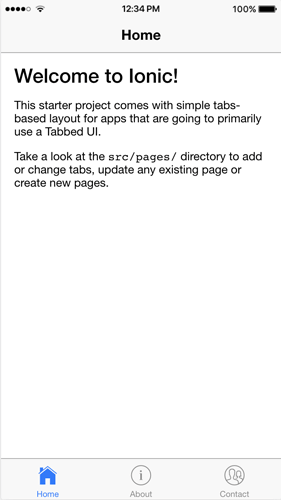
That command will create a new project with the name 'Ionic2RestAuth' with Ionic version 2 and default Tabs view. Go to the newly created project folder then run the app to make sure everything still on the path.
cd Ionic2RestAuth
ionic serve --lab
It should automatically open and run on the browser. If you see the app view like below that means we ready to move on.
2. Create Provider or Service
Now, create a provider or service for accessing REST API. Type this command to create the new provider. Before doing that, stop the app by pressing Command+C on OS X or ctrl+c in Windows.
ionic g provider AuthService
Next, we will add function for calling login, register and log out REST API. For that, Open and edit file src/providers/auth-service.ts. Replace all codes with this codes.
import { Injectable } from '@angular/core';
import { Http, Headers } from '@angular/http';
import 'rxjs/add/operator/map';

let apiUrl = 'http://localhost:8080/api/';

@Injectable()
export class AuthService {

  constructor(public http: Http) {}

  login(credentials) {
    return new Promise((resolve, reject) => {
        let headers = new Headers();
        headers.append('Content-Type', 'application/json');

        this.http.post(apiUrl+'login', JSON.stringify(credentials), {headers: headers})
          .subscribe(res => {
            resolve(res.json());
          }, (err) => {
            reject(err);
          });
    });
  }

  register(data) {
    return new Promise((resolve, reject) => {
        let headers = new Headers();
        headers.append('Content-Type', 'application/json');

        this.http.post(apiUrl+'guest/signup', JSON.stringify(data), {headers: headers})
          .subscribe(res => {
            resolve(res.json());
          }, (err) => {
            reject(err);
          });
    });
  }

  logout(){
    return new Promise((resolve, reject) => {
        let headers = new Headers();
        headers.append('X-Auth-Token', localStorage.getItem('token'));

        this.http.post(apiUrl+'logout', {}, {headers: headers})
          .subscribe(res => {
            localStorage.clear();
          }, (err) => {
            reject(err);
          });
    });
  }

}
You can change 'apiUrl' constant with your REST API URL.
Now, add this provider or service to src/app/app.module.ts in import and @NgModule providers.
import { AuthService } from '../providers/auth-service';providers: [{provide: ErrorHandler, useClass: IonicErrorHandler}, AuthService]
3. Create Login and Register Page
Now, we will be creating a login page which contains view, controller, and stylesheet. Type this command to create the new page.
ionic g page Login
ionic g page Register
Register login page in src/app/app.module.ts, add import for LoginPage and RegisterPage.
import { LoginPage } from '../pages/login/login';
import { RegisterPage } from '../pages/register/register';

Declare LoginPage in @NgModule declaration and components.

@NgModule({
  declarations: [
    MyApp,
    AboutPage,
    ContactPage,
    HomePage,
    TabsPage,
    LoginPage,
    RegisterPage
  ],
  imports: [
    IonicModule.forRoot(MyApp)
  ],
  bootstrap: [IonicApp],
  entryComponents: [
    MyApp,
    AboutPage,
    ContactPage,
    HomePage,
    TabsPage,
    LoginPage,
    RegisterPage
  ],
  providers: [{provide: ErrorHandler, useClass: IonicErrorHandler}, AuthService]
})
Open and edit src/pages/login/login.ts then replace all codes with this.
import { Component } from '@angular/core';
import { NavController, LoadingController, ToastController } from 'ionic-angular';
import { AuthService } from '../../providers/auth-service';
import { TabsPage } from '../tabs/tabs';
import { RegisterPage } from '../register/register';

@Component({
  selector: 'page-login',
  templateUrl: 'login.html'
})
export class LoginPage {

  loading: any;
  loginData = { username:'', password:'' };
  data: any;

  constructor(public navCtrl: NavController, public authService: AuthService, public loadingCtrl: LoadingController, private toastCtrl: ToastController) {}

  doLogin() {
    this.showLoader();
    this.authService.login(this.loginData).then((result) => {
      this.loading.dismiss();
      this.data = result;
      localStorage.setItem('token', this.data.access_token);
      this.navCtrl.setRoot(TabsPage);
    }, (err) => {
      this.loading.dismiss();
      this.presentToast(err);
    });
  }

  register() {
    this.navCtrl.push(RegisterPage);
  }

  showLoader(){
    this.loading = this.loadingCtrl.create({
        content: 'Authenticating...'
    });

    this.loading.present();
  }

  presentToast(msg) {
    let toast = this.toastCtrl.create({
      message: msg,
      duration: 3000,
      position: 'bottom',
      dismissOnPageChange: true
    });

    toast.onDidDismiss(() => {
      console.log('Dismissed toast');
    });

    toast.present();
  }

}
That code adds built-in Ionic 2 module they are LoadingController and ToastController. There is an initial model for hold username and password in the login form. Login function calls AuthService then after successful response token saved in localStorage.
Next, add HTML tags to login view. Open and edit pages/login/login.html then replace all tags with this.
<ion-content padding>
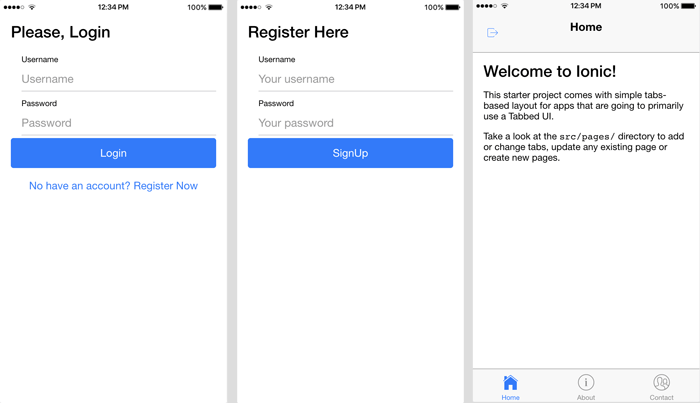
<h2>Please, Login</h2>
<form (submit)="doLogin()">
<ion-item>
<ion-label stacked>Username</ion-label>
<ion-input [(ngModel)]="loginData.username" name="username" type="text" placeholder="Username" ></ion-input>
</ion-item>
<ion-item>
<ion-label stacked>Password</ion-label>
<ion-input [(ngModel)]="loginData.password" name="password" type="password" placeholder="Password"></ion-input>
</ion-item>
<button ion-button block type="submit">
Login
</button>
</form>
<button ion-button block clear (click)="register()">
No have an account? Register Now
</button>
</ion-content>
Next, we have to add register function. Open and edit pages/register/register.ts then replace all with this codes.
import { Component } from '@angular/core';
import { NavController, NavParams, LoadingController, ToastController } from 'ionic-angular';
import { AuthService } from '../../providers/auth-service';

@Component({
  selector: 'page-register',
  templateUrl: 'register.html'
})
export class RegisterPage {

  loading: any;
  regData = { username:'', password:'' };

  constructor(public navCtrl: NavController, public navParams: NavParams, public authService: AuthService, public loadingCtrl: LoadingController, private toastCtrl: ToastController) {}

  doSignup() {
    this.showLoader();
    this.authService.register(this.regData).then((result) => {
      this.loading.dismiss();
      this.navCtrl.pop();
    }, (err) => {
      this.loading.dismiss();
      this.presentToast(err);
    });
  }

  showLoader(){
    this.loading = this.loadingCtrl.create({
        content: 'Authenticating...'
    });

    this.loading.present();
  }

  presentToast(msg) {
    let toast = this.toastCtrl.create({
      message: msg,
      duration: 3000,
      position: 'bottom',
      dismissOnPageChange: true
    });

    toast.onDidDismiss(() => {
      console.log('Dismissed toast');
    });

    toast.present();
  }

}
Now, open and edit pages/register/register.html then replace all HTML tags with this tags.
<ion-content padding>
  <h2>Register Here</h2>
  <form (submit)="doSignup()">
    <ion-item>
      <ion-label stacked>Username</ion-label>
      <ion-input [(ngModel)]="regData.username" name="username" type="text" placeholder="Your username" ></ion-input>
    </ion-item>
    <ion-item>
      <ion-label stacked>Password</ion-label>
      <ion-input [(ngModel)]="regData.password" name="password" type="password" placeholder="Your password"></ion-input>
    </ion-item>
    <button ion-button block type="submit">
      SignUp
    </button>
  </form>
</ion-content>
Login and Register form above just the basic form. If you like the more complex form you can see in this tutorial.
4. Add Logout and Token Checker
The last thing to complete this tutorial is adding logout function that will put in Home Page and also create a token checker to check if there is no token, the app will redirected to Login Page. Open and edit pages/tabs/tabs.ts then replace all with this codes.
import { Component } from '@angular/core';
import { NavController } from 'ionic-angular';
import { HomePage } from '../home/home';
import { AboutPage } from '../about/about';
import { ContactPage } from '../contact/contact';
import { LoginPage } from '../login/login';

@Component({
  templateUrl: 'tabs.html'
})
export class TabsPage {
  // this tells the tabs component which Pages
  // should be each tab's root Page
  tab1Root: any = HomePage;
  tab2Root: any = AboutPage;
  tab3Root: any = ContactPage;

  constructor(public navCtrl: NavController) {
    if(!localStorage.getItem("token")) {
      navCtrl.setRoot(LoginPage);
    }
  }
}
Next, open and edit pages/home/home.ts and replace all codes with this.
import { Component } from '@angular/core';
import { AuthService } from '../../providers/auth-service';
import { NavController, App, LoadingController, ToastController } from 'ionic-angular';
import { LoginPage } from '../login/login';

@Component({
  selector: 'page-home',
  templateUrl: 'home.html'
})
export class HomePage {

  loading: any;
  isLoggedIn: boolean = false;

  constructor(public app: App, public navCtrl: NavController, public authService: AuthService, public loadingCtrl: LoadingController, private toastCtrl: ToastController) {
    if(localStorage.getItem("token")) {
      this.isLoggedIn = true;
    }
  }

  logout() {
    this.authService.logout().then((result) => {
      this.loading.dismiss();
      let nav = this.app.getRootNav();
      nav.setRoot(LoginPage);
    }, (err) => {
      this.loading.dismiss();
      this.presentToast(err);
    });
  }

  showLoader(){
    this.loading = this.loadingCtrl.create({
        content: 'Authenticating...'
    });

    this.loading.present();
  }

  presentToast(msg) {
    let toast = this.toastCtrl.create({
      message: msg,
      duration: 3000,
      position: 'bottom',
      dismissOnPageChange: true
    });

    toast.onDidDismiss(() => {
      console.log('Dismissed toast');
    });

    toast.present();
  }

}
The last, add logout button to Home Page by add this tags in nav section.
<ion-header>
  <ion-navbar>
    <button ion-button clear (click)="logout()">
      <ion-icon name="log-out"></ion-icon>
    </button>
    <ion-title>Home</ion-title>
  </ion-navbar>
</ion-header>
Finally, run your app.
ionic serve --lab
It will automatically open the browser. Now, you can test all functionality of the app that we have been created.
If you found any problem with this tutorial. Please, feel free to fill the comment below.
Full source code can find on our GitHub.
Thanks.
0 comments