Ionic 3 and Angular 4 Mobile App Example
This tutorial shows you how to build Ionic 3 and Angular 4 mobile app in step by step example with pages lazy loading. The Ionic 3 is still beta and it launches a few days ago. For that, we do not yet recommend to use this beta version in production or published app. Before we started, there is some checklist should be done.
- Node.js already installed with Node.js command prompt on Windows.
- Update Ionic to the latest version using this command.
npm install -g ionic
or
sudo npm install -g ionic
- Check Ionic version and it's environment.
ionic info
Our is like this.
Cordova CLI: 6.5.0
Ionic CLI Version: 2.2.2
Ionic App Lib Version: 2.2.1
ios-deploy version: 1.9.0
ios-sim version: 5.0.12
OS: OS X El Capitan
Node Version: v6.9.4
Xcode version: Xcode 8.0 Build version 8A218a
As usually, we start the tutorial from scratch. We will build Ionic 3 app that shows the list of countries taken from REST API. We will be using this API from REST Countries.
1. Create Ionic 3 App
Still the same as previous version of Ionic. Type this command to create new Ionic 3 App.
ionic start ionic3-angular4 --v2
That command still uses "--v2" prefix, but don't worry if you check dependencies in "package.json" you will see the difference.
"dependencies": {
  "@angular/common": "4.0.0",
  "@angular/compiler": "4.0.0",
  "@angular/compiler-cli": "4.0.0",
  "@angular/core": "4.0.0",
  "@angular/forms": "4.0.0",
  "@angular/http": "4.0.0",
  "@angular/platform-browser": "4.0.0",
  "@angular/platform-browser-dynamic": "4.0.0",
  "@ionic-native/core": "3.4.2",
  "@ionic-native/splash-screen": "3.4.2",
  "@ionic-native/status-bar": "3.4.2",
  "@ionic/storage": "2.0.1",
  "ionic-angular": "3.0.0",
  "ionicons": "3.0.0",
  "rxjs": "5.1.1",
  "sw-toolbox": "3.4.0",
  "zone.js": "^0.8.4"
},
Now, run it on the browser after type this command.
ionic serve -l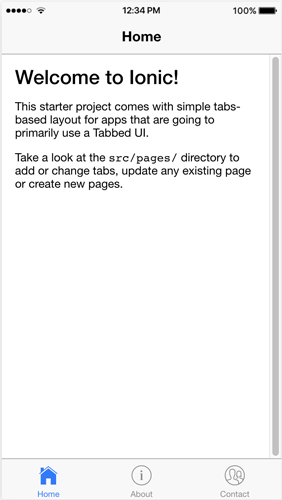
You will see the same view as previous Ionic 2.
2. Workaround for Pages Lazy Loading
Before we move forward, let's implement this Ionic 3 lazy loading guides. Begin with modify 'src/app/app.module.ts' remove all import, declarations and entry components of all pages. The file content should be like this now.
import { NgModule, ErrorHandler } from '@angular/core';
import { BrowserModule } from '@angular/platform-browser';
import { IonicApp, IonicModule, IonicErrorHandler } from 'ionic-angular';
import { MyApp } from './app.component';

import { StatusBar } from '@ionic-native/status-bar';
import { SplashScreen } from '@ionic-native/splash-screen';

@NgModule({
  declarations: [
    MyApp
  ],
  imports: [
    BrowserModule,
    IonicModule.forRoot(MyApp, {
      preloadModules: true
    })
  ],
  bootstrap: [IonicApp],
  entryComponents: [
    MyApp
  ],
  providers: [
    StatusBar,
    SplashScreen,
    {provide: ErrorHandler, useClass: IonicErrorHandler}
  ]
})
export class AppModule {}
Now, change add module file for each page. For example, the file name should be like this 'pages/home/home.modules.ts'. Then add this lines of codes.
import { NgModule } from '@angular/core';
import { HomePage} from './home';
import { IonicPageModule } from 'ionic-angular';

@NgModule({
  declarations: [HomePage],
  imports: [IonicPageModule.forChild(HomePage)],
  entryComponents: [HomePage]
})
export class HomePageModule { }
Next, we have to add import and annotation to current 'pages/home/home.ts'.
import { IonicPage } from 'ionic-angular';
...
@IonicPage()
@Component({
  selector: 'page-home',
  templateUrl: 'home.html'
})
export class HomePage {
...
Do the same thing for another page give name following the class name of the page.
The last thing is to modify 'src/app/app.component.ts' by removing import to the page. Then change the reference to the page to be a string by adding a single quote.
Before:
rootPage:any = TabsPage;
After:
rootPage:any = 'TabsPage';
You should do the same way for calling the page from another page. For example, in the tabs page.
import { Component } from '@angular/core';
import { IonicPage } from 'ionic-angular';

@IonicPage()
@Component({
  templateUrl: 'tabs.html'
})
export class TabsPage {

  tab1Root: string = 'HomePage';
  tab2Root: string = 'AboutPage';
  tab3Root: string = 'ContactPage';

  constructor() {

  }
}
3. Create Ionic 3 Service
For accessing REST API, we need to create Service or Provider by type this command.
ionic g provider rest
Open and edit "src/providers/rest.ts" then add or change this imports.
import { Http, Response } from '@angular/http';
import { Observable } from 'rxjs/Observable';
import 'rxjs/add/operator/catch';
import 'rxjs/add/operator/map';
Declare URL string variable below class name.
private apiUrl = 'https://restcountries.eu/rest/v2/all';
Create this functions.
getCountries(): Observable<string[]> {
  return this.http.get(this.apiUrl)
                  .map(this.extractData)
                  .catch(this.handleError);
}

private extractData(res: Response) {
  let body = res.json();
  return body || { };
}

private handleError (error: Response | any) {
  let errMsg: string;
  if (error instanceof Response) {
    const body = error.json() || '';
    const err = body.error || JSON.stringify(body);
    errMsg = `${error.status} - ${error.statusText || ''} ${err}`;
  } else {
    errMsg = error.message ? error.message : error.toString();
  }
  console.error(errMsg);
  return Observable.throw(errMsg);
}
We have to register "HttpModule" in "app.module.ts", add this import to "app.module.ts".
import { HttpModule } from '@angular/http';
In @NgModule imports, section adds "HttpModule" so it will look like this.
imports: [
  BrowserModule,
  IonicModule.forRoot(MyApp),
  HttpModule
],
Still on "app.module.ts", register "Rest" provider by import that provider first.
import { Rest } from '../providers/rest';
In @NgModule providers, section adds "Rest".
providers: [
  StatusBar,
  SplashScreen,
  {provide: ErrorHandler, useClass: IonicErrorHandler},
  Rest
]
4. Modify Existing Home Page
Now, it's a time to display country list i the Home page. First, we have to modify "src/pages/home/home.ts" replace all codes with this.
import { Component } from '@angular/core';
import { IonicPage } from 'ionic-angular';
import { NavController } from 'ionic-angular';
import { Rest } from '../../providers/rest';

@IonicPage()
@Component({
  selector: 'page-home',
  templateUrl: 'home.html'
})
export class HomePage {

  countries: string[];
  errorMessage: string;

  constructor(public navCtrl: NavController, public rest: Rest) {

  }

  ionViewDidLoad() {
    this.getCountries();
  }

  getCountries() {
    this.rest.getCountries()
       .subscribe(
         countries => this.countries = countries,
         error =>  this.errorMessage = <any>error);
  }

}
Next, open and edit "src/pages/home/home.html" then replace all tags with this.
<ion-header>
  <ion-navbar>
    <ion-title>Home</ion-title>
  </ion-navbar>
</ion-header>

<ion-content padding>
  <ion-list>
    <ion-item *ngFor="let c of countries">
      <ion-avatar item-left>
        <img src="{{c.flag}}">
      </ion-avatar>
      <h2>{{c.name}}</h2>
      <p>Capital: {{c.capital}}, Region: {{c.region}}</p>
    </ion-item>
  </ion-list>
</ion-content>
That it's, our simple Ionic 3 and Angular 4 app is ready to run.
5. Run the App in Browser and Devices
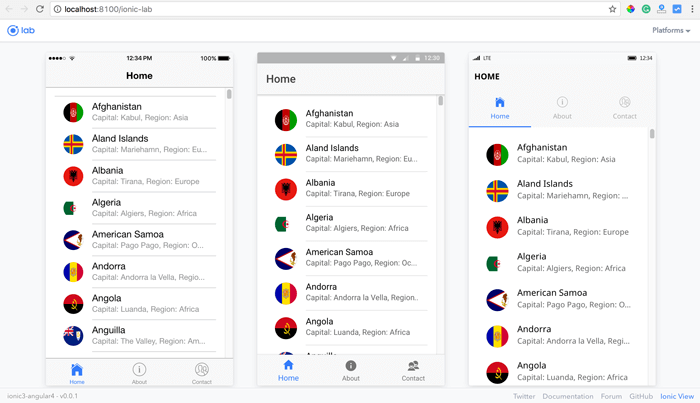
Before running on real devices, first, run this app in the browser by type this command.
ionic serve -l
You will see the list of the countries like below.
Now, on the real device, we have to modify default config.xml to make API calls without error. Add this preference.
<preference name="loadUrlTimeoutValue" value="700000" />
Next, we have to clean up default platform that generated when create Ionic 3 app.
ionic platform rm ios
ionic platform add ios
ionic platform rm android
ionic platform add android
Connect your device to your computer. Run this command for Android device.
ionic run android --prod
And for iOS run this command.
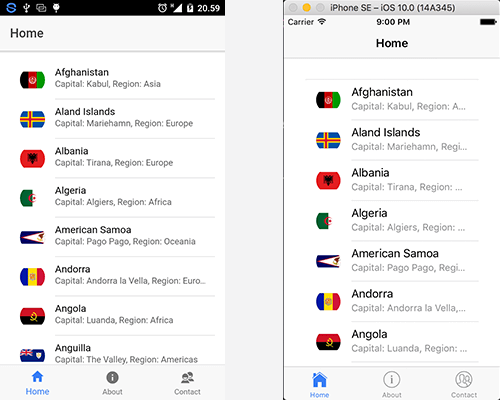
ionic run ios --prod
You see this on Android and iOS devices.
We have done and run all steps in this tutorial smoothly. It seems no difference between Ionic 3 - Angular 4 and Ionic 2 - Angular 2. Maybe in the more complex mobile app, we will get significant improvement especially in the performance of Angular 4.
An event we do not recommend yet to build production mobile app, we still can try to build a simple mobile app for production. Until now, Ionic Framework team still working very hard to make this Ionic 3 beta to be released version.
Feel free to give us comments, critics or suggestion below to improve this article
You can find the full source code on our Github.
Thanks
0 comments