Ionic 2 FCM Push Notification
This is a tutorial about how to add push notification to Ionic 2 App using Firebase Cloud Messaging (FCM) in complete steps for production iOS and Android apps.
How does it work? Push notification sent from app server to Firebase then firebase distribute to iOS and Android devices that have registered to Firebase. The Android app receives push notification that carried by Google services and iOS app receive a push notification that carried by Apple Push Service that gets notification from Firebase.
Now, let's get started.
1. Create Apple Push Services Certificate
Before creating Apple Push Services Certificate make sure you have active Apple account with Developer Enrollment and of course you're working with mac os x. To create Apple Push Services Certificate go to Apple Developer Portal (https://developer.apple.com/).
- Choose Account then Login with your Apple account that Enrollment enable.
- Choose certificates, identifiers, and profiles.
- Choose Identifiers -> App ID from left menu.
- Click plus button on the top right.
- Fill register IOS app ID form. For example
- App ID Description = MyFCM App
- App ID Suffix -> Explicit App ID -> Bundle ID = com.myfcmapp
- App Service -> check Push Notifications
- Click Continue.
- If you see Push notification checked with configurable click Register button.
- You should see Registration Complete summary with some service enable.
- Click Done.

- Choose Certificates -> Development on the left menu.
- Click plus button.
- Choose Apple Push Notification Service then click Continue button.
- Choose App ID that newly created the click Continue button.
- Follow instruction About Creating a Certificate Signing Request (CSR), after CSR created click Continue button.
- Choose/Upload CSR file that newly created before then click Continue button.
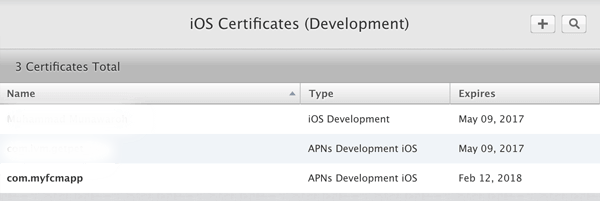
- In page Your Certificate Ready, click Download button to get Push Service Certificate.
- After download, double-click the downloaded file to open Keychain Access in OS X.
- You should see your certificate on the list then right click on that new certificate in the list.
- Click File -> Export Items.
- Save as (mine: "MyFCMPushDev") and choose type as Personal Information Exchange (.p12) then click Save.
- Enter a password for use in Firebase dashboard then click OK.
- If it shows a popup to enter the password again use your Mac OS X password then click OK.
- Back to the browser, click Add Another Button to create Distribution Apple Push Certificate.
- Choose Apple Push Notification service SSL (Sandbox & Production) then click Continue.
- Choose App ID same as before then click Continue.
- Bypass About Creating a Certificate Signing Request (CSR), because we will use existing CSR file then click Continue button.
- Choose/Upload CSR file same as before then click continue.
- In Your certificate is ready, click Download button to get Distribution Apple Push Certificate.
- After download, double click the downloaded file to open Keychain Access in OS X.
- You should see your certificate on the list then right click on that new certificate in the list.
- Click File -> Export Items.
- Save as (mine: "MyFCMPushDist") and choose type as Personal Information Exchange (.p12) then click Save.
- Enter a password for use in Firebase dashboard then click OK.
- If it shows a popup to enter the password again use your Mac OS X password then click OK.
- Back to the browser, click Add another button if you want to create Certificates for Publishing and Development Testing or just click Done to finish.
- Now choose Provisioning Profiles -> Development.
- Click plus button.
- Choose iOS App Development then click Continue button.
- Choose App ID that newly created then click Continue button.
- Select Certificate by check existing IOS Development item or if you don't see it create Development certificate in the previous step as creating Apple Push Certificate.
- Click Continue button.
- Select Devices that will use for testing the app if not exist add it in Devices -> iPhone on the left menu.
- Click Continue button.
- Give your new profile a name, mine is "MyFCMAppDevProfile" then click Continue button.
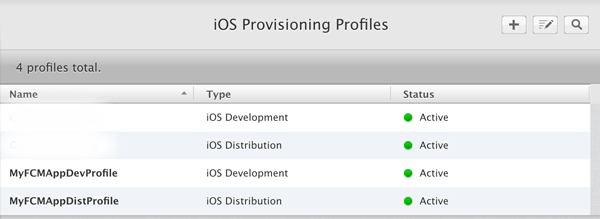
- In Your provisioning profile is ready, click Download button to get Provisioning Profile file.
- Click Add Another to create Provisioning Profile for Distribution/Apple Store.
- Choose Distribution -> App Store then click Continue button.
- Choose App ID same as before the click Continue button.
- Select Certificate by check existing IOS Distribution item or if you don't see it create Distribution certificate in the previous step as creating Apple Push Certificate.
- Click Continue button.
- Give your new profile a name, mine is "MyFCMAppDistProfile" then click Continue button.
- In Your provisioning profile is ready, click Download button to get Provisioning Profile file.
- Click Done button to finish.
- Don't forget to double click that downloaded Provisioning Profiles to get activated in your XCode.
2. Setting Up Firebase
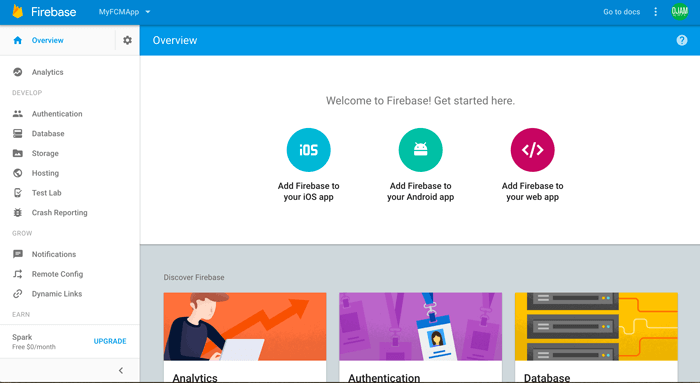
This time to setting up Firebase for Push Notification. Go to Firebase Console. Log in with your google account.
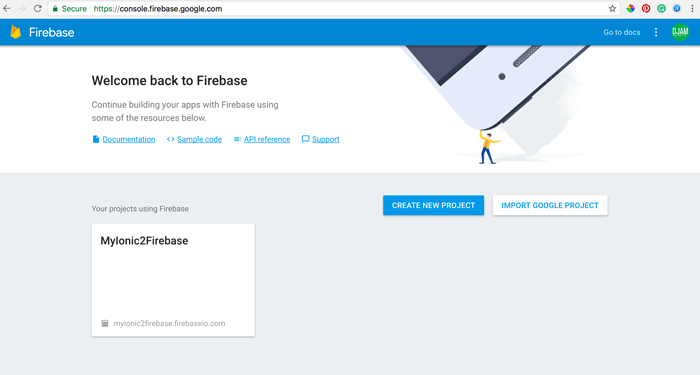
Create a new project by click Create New Project button. Then fill the form, my example:
- Project Name = MyFCMApp
- Country/Region = MyCountry
Click Create Project button, after finished you will be redirected to Firebase dashboard.
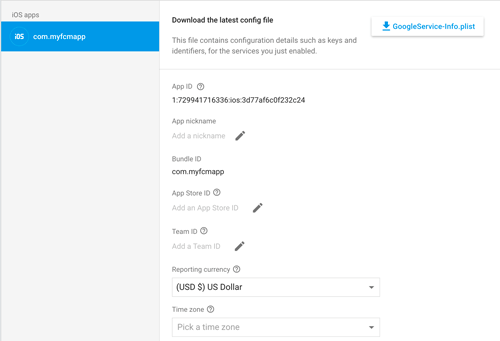
Click on Settings (Gear icon on the left menu, the right side of Overview menu). Then click Project Settings. Go to Cloud Messaging tab then write Server Key or Legacy Server Key to notepad or whatever to keep it. Back to General Tab then scroll down and choose Add Firebase To Your IOS APP button. Fill the form, my example:
- iOS Bundle App = "com.myfcmapp" (on the previous step when creating Apple App ID)
- Left Nickname and App Store ID blank because it's optional
After click ADD APP button, it will download "GoogleService-info.plist" file automatically. Click continue button, we can skip this step because we use Ionic App. Click continue again, we can ignore the Swift/Objective-C code then click Finish.
Next, go to Cloud Messaging tab again. Under iOS app configuration upload all Apple Push certificate (.p12) files that previously created in first steps.
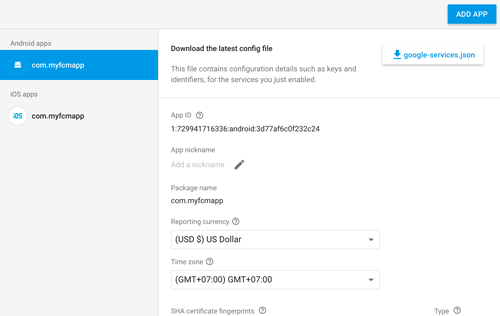
Back again to the General tab. Click again ADD APP button to add Android app. Choose Android App then fill the form, mine is:
- Package name = "com.myfcmapp"
- Left two fields below of package name blank because it's optional
- Package name = "com.myfcmapp"
- Left two fields below of package name blank because it's optional
After click ADD APP button, it will automatically download "google-service.json" file. Click Continue button, we can write the code (it might be useful later) then click Finish. Now, we have 2 apps in our Firebase dashboard.
3. Create New Ionic 2 App
As usually in our tutorial, we have to create new Ionic 2 before go to the next steps. Open terminal/cmd then go to your project folder. In there, type this command to create new Ionic 2 App.
ionic start MyFCMApp --v2
After finished create a project and run "npm install" automatically, go to the app folder that newly created.
cd MyFCMApp
Now, install Cordova FCM plugin by this command.
cordova plugin add cordova-plugin-fcm
You will see a red error message.
Error: cordova-plugin-fcm: You have installed platform ios but file 'GoogleService-Info.plist' was not found in your Cordova project root folder.
Just copy file "GoogleService-Info.plist" that downloaded in the previous step to folder "platform/ios". Next, add android platform because when create Ionic 2 app default platform added is iOS.
ionic platform add android@6.1.0
We added version "6.1.0" because when this tutorial writes, default "cordova-android" version is "6.0.0" and there's a bug in icon/splash screen resource. Now, copy file "google-services.json" to folder "platform/android".
Oh wait, don't forget to copy both GoogleService-info.plist and "google-services.json" to the root of Ionic 2 project folder.
4. Configure FCM in Ionic 2 App
Now, the time for configuring FCM in Ionic 2 App. Open this new Ionic 2 project folder in your IDE or Text Editor. Edit file "src/app/app.component.ts" and declare FCM plugin before "@Component".
declare var FCMPlugin;
@Component({
  templateUrl: 'app.html'
})
Inside constructor and platform ready add this lines of codes.
FCMPlugin.getToken(
  (t) => {
    console.log(t);
  },
  (e) => {
    console.log(e);
  }
);

FCMPlugin.onNotification(
  (data) => {
    console.log(data);
  },
  (e) => {
    console.log(e);
  }
);
Don't forget to change App ID in config.xml to match App ID in Firebase and Apple App ID.
That it's, now you just can run your app in a device with this command.
ionic run android
If you want to test in an iOS device, build to iOS first.
ionic build ios
Then run the app to an iOS device from XCode. Don't forget to turn on push notification in capabilities section of project configuration and use provisioning profile that previously downloaded and set in XCode.
Problem:
You will face an error like this.
You will face an error like this.
Error: Invalid data, chunk must be a string or buffer, not object
Solution:
Remove default added ios platform when creating Ionic 2 app then add again. And also remove and add "cordova-fcm-plugin".
Remove default added ios platform when creating Ionic 2 app then add again. And also remove and add "cordova-fcm-plugin".
ionic platform rm ios
ionic platform add ios
cordova plugin rm cordova-plugin-fcm
cordova plugin add cordova-plugin-fcm
After app running in devices, go to Firebase console then open menu Notifications on left side.
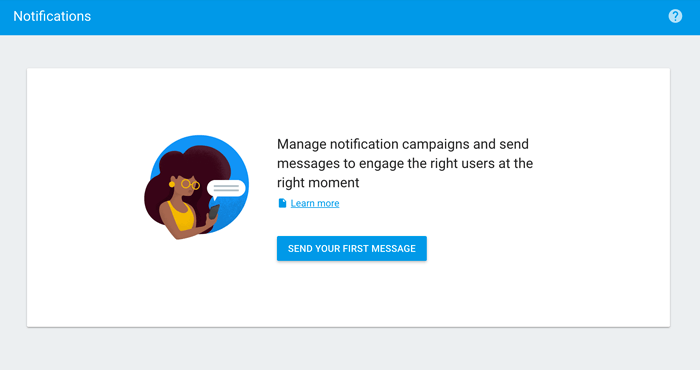
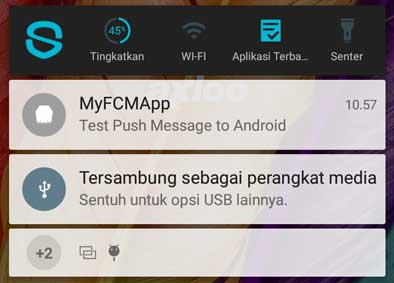
If this is the first time click on SEND YOUR FIRST MESSAGE button. Fill the form, for example:
- Message Text = "Test Push Message to Android"
- Message Label (optional) = "Test Push Message to Android"
- Delivery Date = Send Now
- Target = User Segment
- App = "com.myfcmapp" (android icon)
Then click SEND MESSAGE button. When popup show, click SEND. If you see like this on your Android device then you have setting up Ionic 2 and FCM successfully.
You can do the same for iOS except for Target App change to App ID with an iOS icon.
Thanks.
0 comments